Using the new location button to access your user’s GPS location
One of the most sensitive pieces of data when it comes to privacy is a user’s physical location. Because of that, Apple has extensive requirements that have to be met in order to access that data, including explicitly asking users for permission the first time that an app wants to use it.
Many times when an app needs the user’s location, it’s for a one-time operation, for example in order to fill out the user’s current address for a delivery, or to search for nearby places. For that use case, Apple has for a while offered the ability for users to allow apps to access their location just once.
With iOS 15 and watchOS 8, Apple is now introducing LocationButton, a SwiftUI view that gives your app access to the user’s location once, without requiring an explicit permission every time that it’s used. There’s also CLLocationButton for UIKit-based apps, but I’m going to focus on the SwiftUI variant in this article.
Setting up a map view
To demonstrate how the new button works, let’s create a simple SwiftUI view that displays a map:
struct ContentView: View {
    @StateObject var locationManager = ObservableLocationManager()

    var body: some View {
        ZStack(alignment: .bottom) {
            Map(coordinateRegion: $locationManager.region, showsUserLocation: true)
                .edgesIgnoringSafeArea(.all)
        }
    }
}
To drive the map, I’m using an ObservableLocationManager, which is a simple class that I made to wrap a CLLocationManager into an object that my view can observe:
final class ObservableLocationManager: NSObject, ObservableObject, CLLocationManagerDelegate {
    private let locationManager = CLLocationManager()

    static let defaultDistance: CLLocationDistance = 1000000

    @Published var region = MKCoordinateRegion(
        center: CLLocationCoordinate2D(latitude: 42.0422448, longitude: -102.0079053),
        latitudinalMeters: ObservableLocationManager.defaultDistance,
        longitudinalMeters: ObservableLocationManager.defaultDistance
    )

    override init() {
        super.init()

        locationManager.delegate = self
    }

    func updateLocation() {
        locationManager.requestLocation()
    }

    func locationManager(_ manager: CLLocationManager, didUpdateLocations locations: [CLLocation]) {
        guard let location = locations.first else { return }

        DispatchQueue.main.async {
            self.region = MKCoordinateRegion(
                center: location.coordinate,
                latitudinalMeters: Self.defaultDistance,
                longitudinalMeters: Self.defaultDistance
            )
        }
    }

    func locationManager(_ manager: CLLocationManager, didFailWithError error: Error) {
        // Error handling
        ...
    }
}
Using the new LocationButton to show the user’s location
Now that we have a basic app that shows a map, let’s add a LocationButton to it, so that we can display the user’s current location on the map:
var body: some View {
    ZStack(alignment: .bottom) {
        Map(coordinateRegion: $locationManager.region, showsUserLocation: true)
            .edgesIgnoringSafeArea(.all)

        HStack {
            Spacer()

            LocationButton {
                locationManager.updateLocation()
            }
            .frame(width: 60, height: 60)
            .cornerRadius(30)
            .labelStyle(.iconOnly)
            .symbolVariant(.fill)
            .foregroundColor(.white)
        }
        .padding()
    }
}
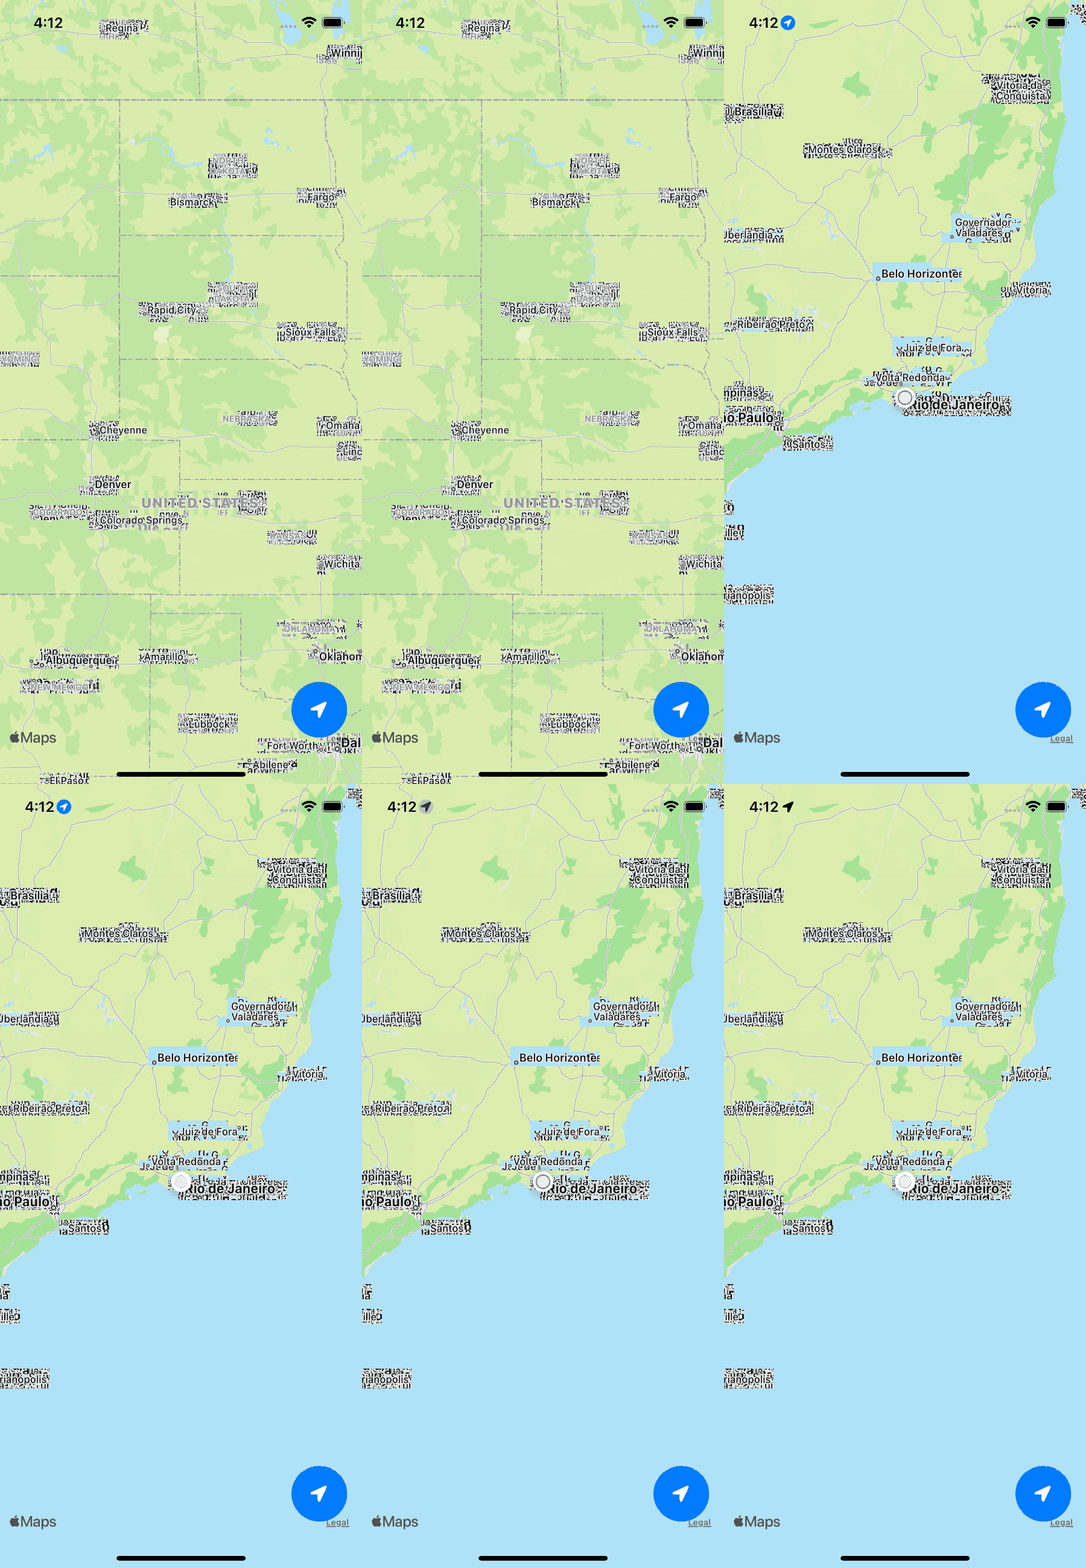
As you can see, the location button is very easy to implement, and can be customized to our liking. In my example, I decided to make it a round button that just displays the typical “location arrow” icon. When the user taps the button, it will call the closure that we have specified.
Within that closure, it’s as if our app has been given permission to access the user’s location once, but without us having to do the work of displaying the permission prompt and handling the result. So all that I have to do when the button is tapped is to tell my location manager to update its location, which in turn asks the CLLocationManager for the user’s current location.
Here’s the final result:

Please forgive the poor rendering of the map in the above demo. The map is not rendering quite well in the Simulator. It’s beta 1, after all.
Conclusion
I really like the new location button, as it will make things much simpler for both developers and users when it comes to accessing the user’s location once, while at the same time preserving the user’s privacy.
This has been my final article for the 2021 edition of WWDC by Sundell & Friends, I hope you’ve enjoyed reading! If you’d like to see more content from me, make sure to follow me on Twitter and check out my blog.
Talk to you again next year 👋🏻
 Bitrise
Automatically build, test and distribute your app on every Pull Request, and use a powerful new suite of add-ons to visualize your test results, to ship your app with ease, and to add crash and performance monitoring to your project. Get started for free.

